SSH, remote login with with secure shell
Introduction
This manual will help you set up a connection to another computer using ssh. This is especially useful for connecting from your desktop or laptop to a HPC server. The resulting connection will give you a command line interface (terminal) in which you can start your application and manage your data. In most cases the server will run Linux so you will need to know how to use the Linux command line.
You can find the available HPC servers via this link.
Besides logging in to remote computer you can also use the ssh connection for filetransfer. This method is named SFTP. More information about this can be found in data_transfer.
This document will explain how to install a SSH client and how to setup an SSH connection.
Install
Linux/macOS
All Linux-distributions and macOS provide an SSH-client. If it is not available you can install it via the package-manager:
- yum (RedHat, Fedora, CentOS)
$ sudo yum install openssh-client
- apt (Debian, Ubuntu)
$ sudo apt install openssh-client
- brew (macOS)
$ brew install openssh
After installation you can connect to the server with:
$ ssh <netid>@hpc29.tudelft.net
Windows
Currently MobaXterm is the preferred SSH client for Windows. On older Windows installation PuTTY might be installed, which is also a great SSH client but with less possibilities.
MobaXterm
The MobaXterm package allows you to connect to servers and access all files in the current directory of your SSH connection. The Portable Home Edition version can be installed free of charge without administrator rights. If you do have administrator rights consider installing the Installer Home Edition:
If you would like to access the HPC cluster follow these instructions to setup a connection to login1.hpc.tudelft.nl via linux-bastion.tudelft.nl (or student-linux.tudelft.nl if you are a student):
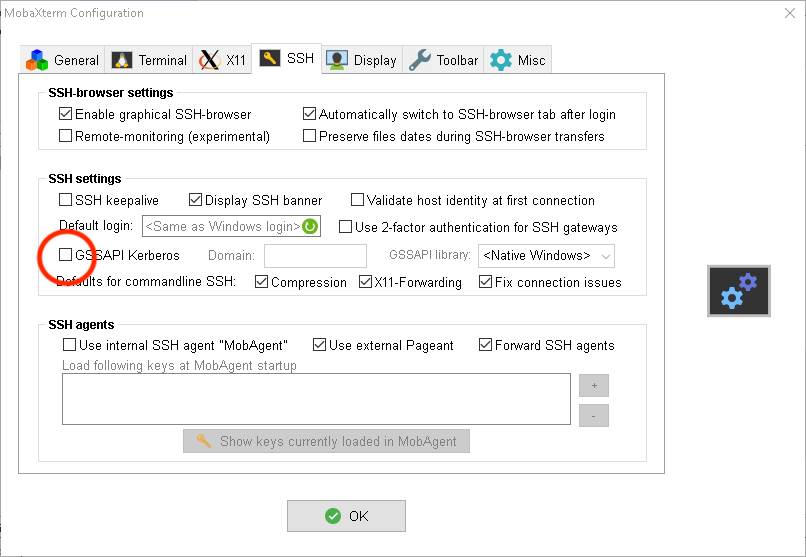
- goto Settings→Configuration menu
-
select SSH tab, deselect GSSAPI Kerberos and click OK:
-
goto Sessions→New session menu
-
select SSH tab and fill in the following fields:
- Remote host:
login1.hpc.tudelft.nl - enable Specify username and enter your NetID
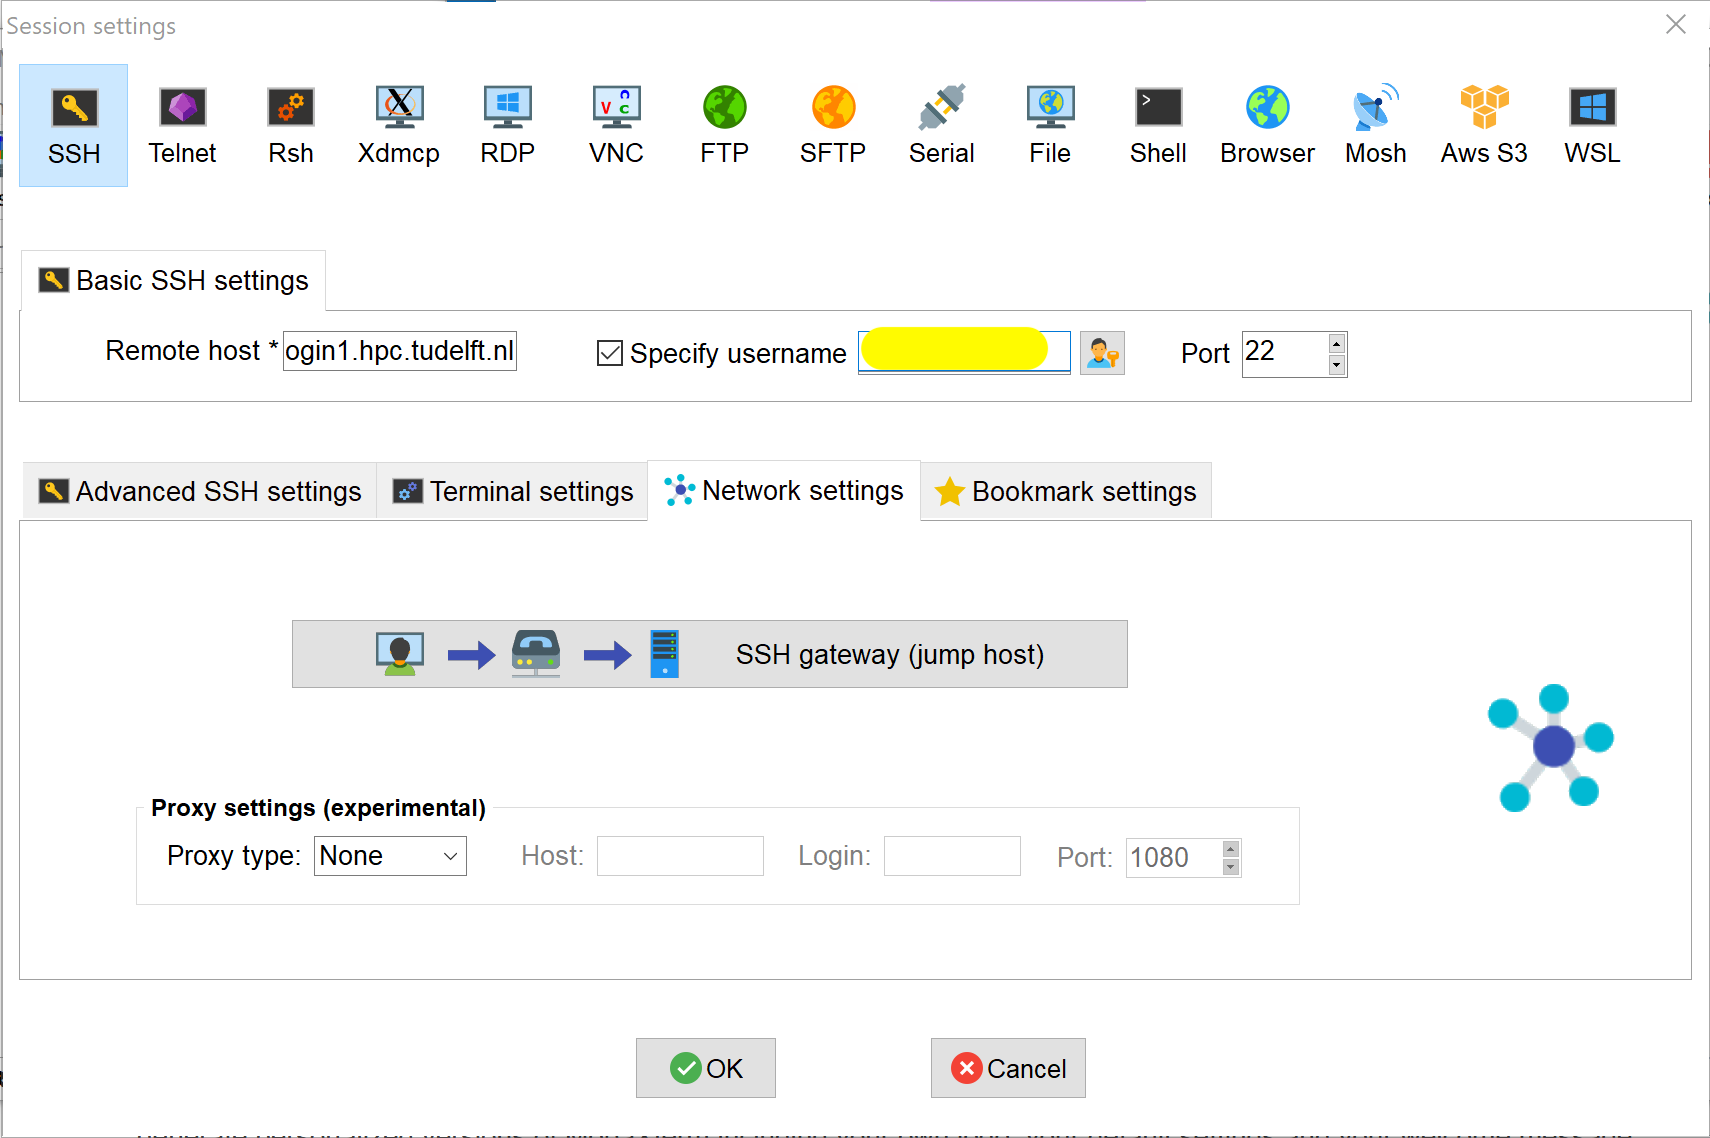
- Remote host:
-
select Network settings tab in the middle of the window, click SSH gateway (jump host), fill in the following fields and click OK:
- Gateway host:
linux-bastion.tudelft.nl(orstudent-linux.tudelft.nlif you are a student) - Username: your NetID
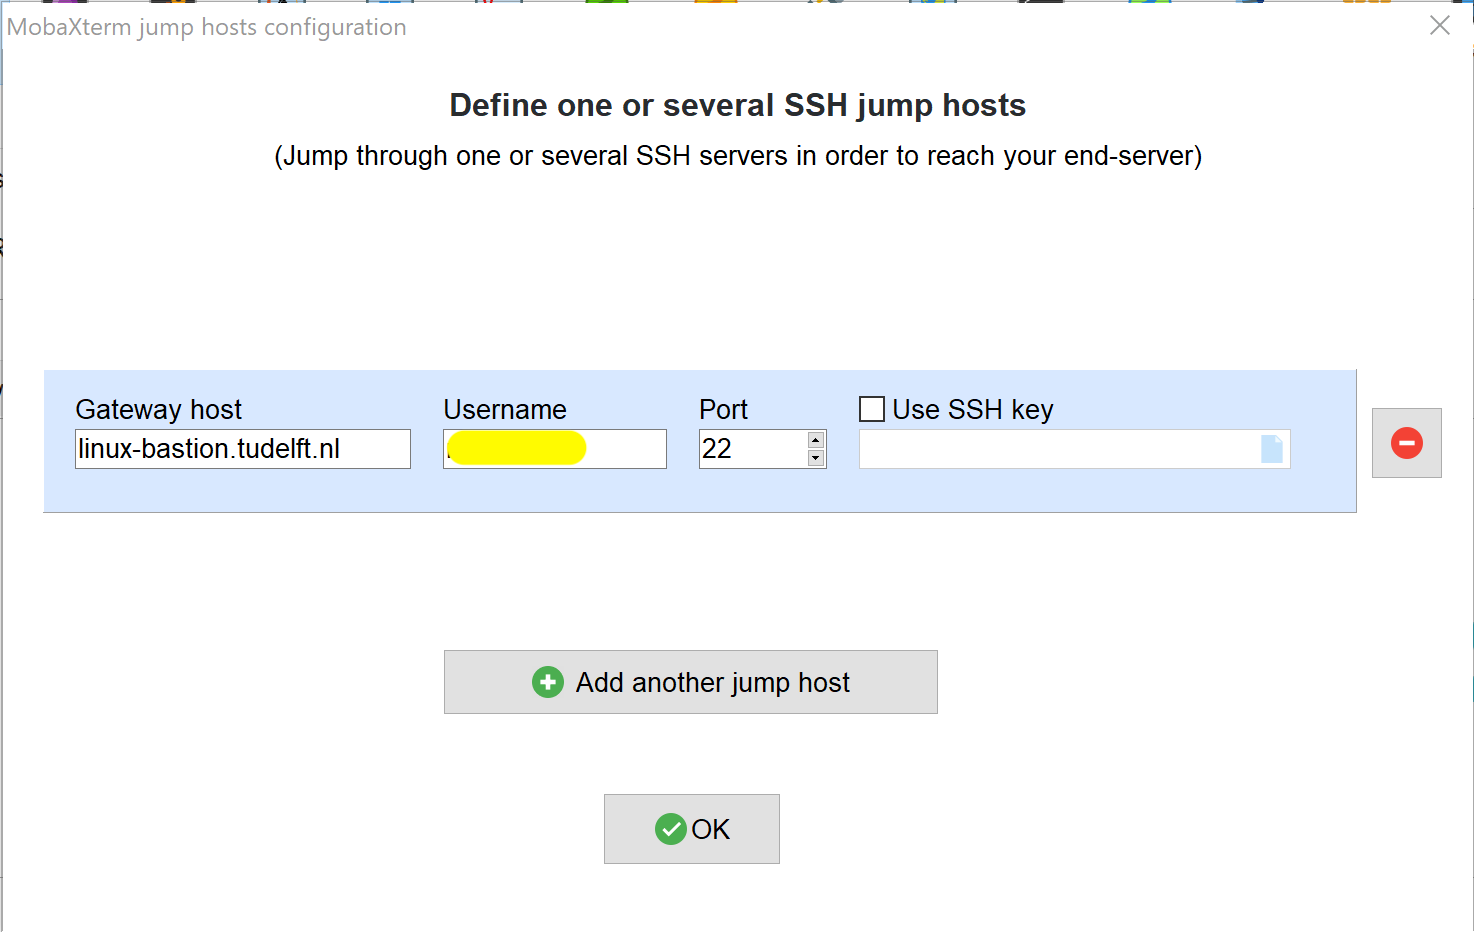
- Gateway host:
-
click OK in the Session settings window
-
enter your NetID password for the connection to the
linux-bastion.tudelft.nl(student-linux.tudelft.nl):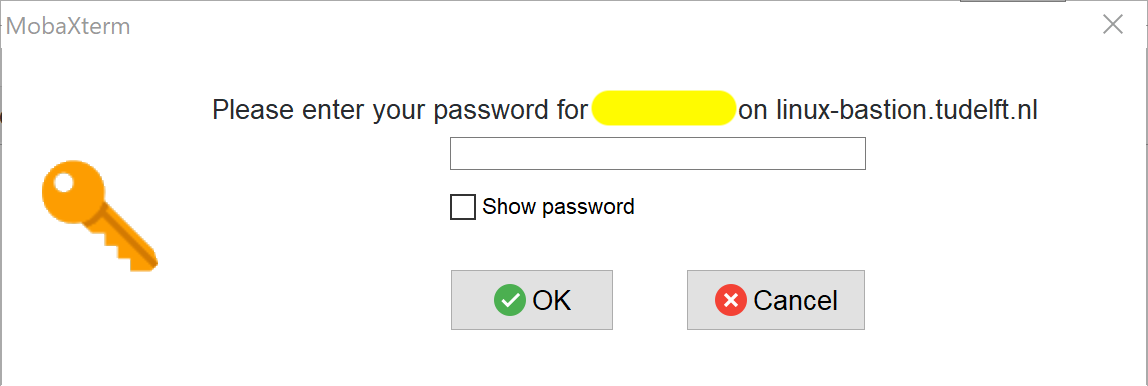
-
on the left side you will now see your new session named login1.hpc.tudelft.nl. Double click this session
-
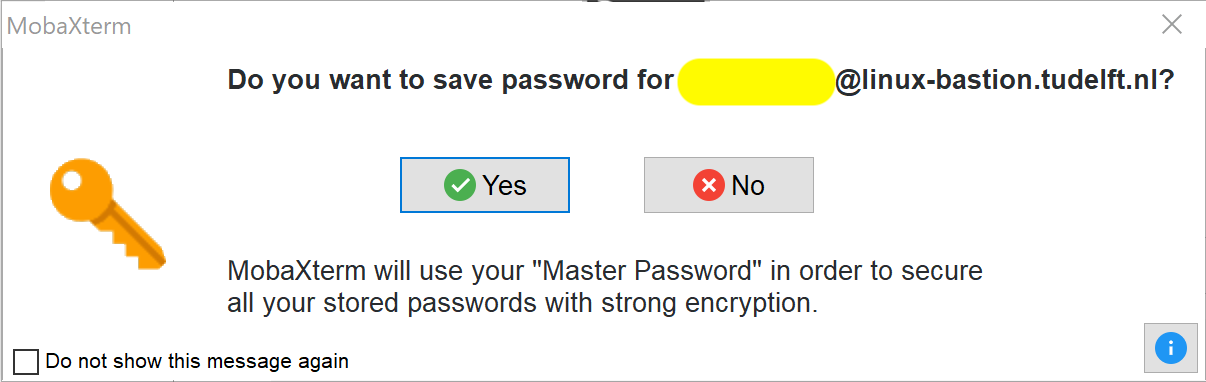
the first time you start this session you might be required to fill in your NetID password again. After that you can decide to store your password(s) in MobaXterm by clicking yes
-
fill in the fields for your MobaXterm Master Password and click OK
-
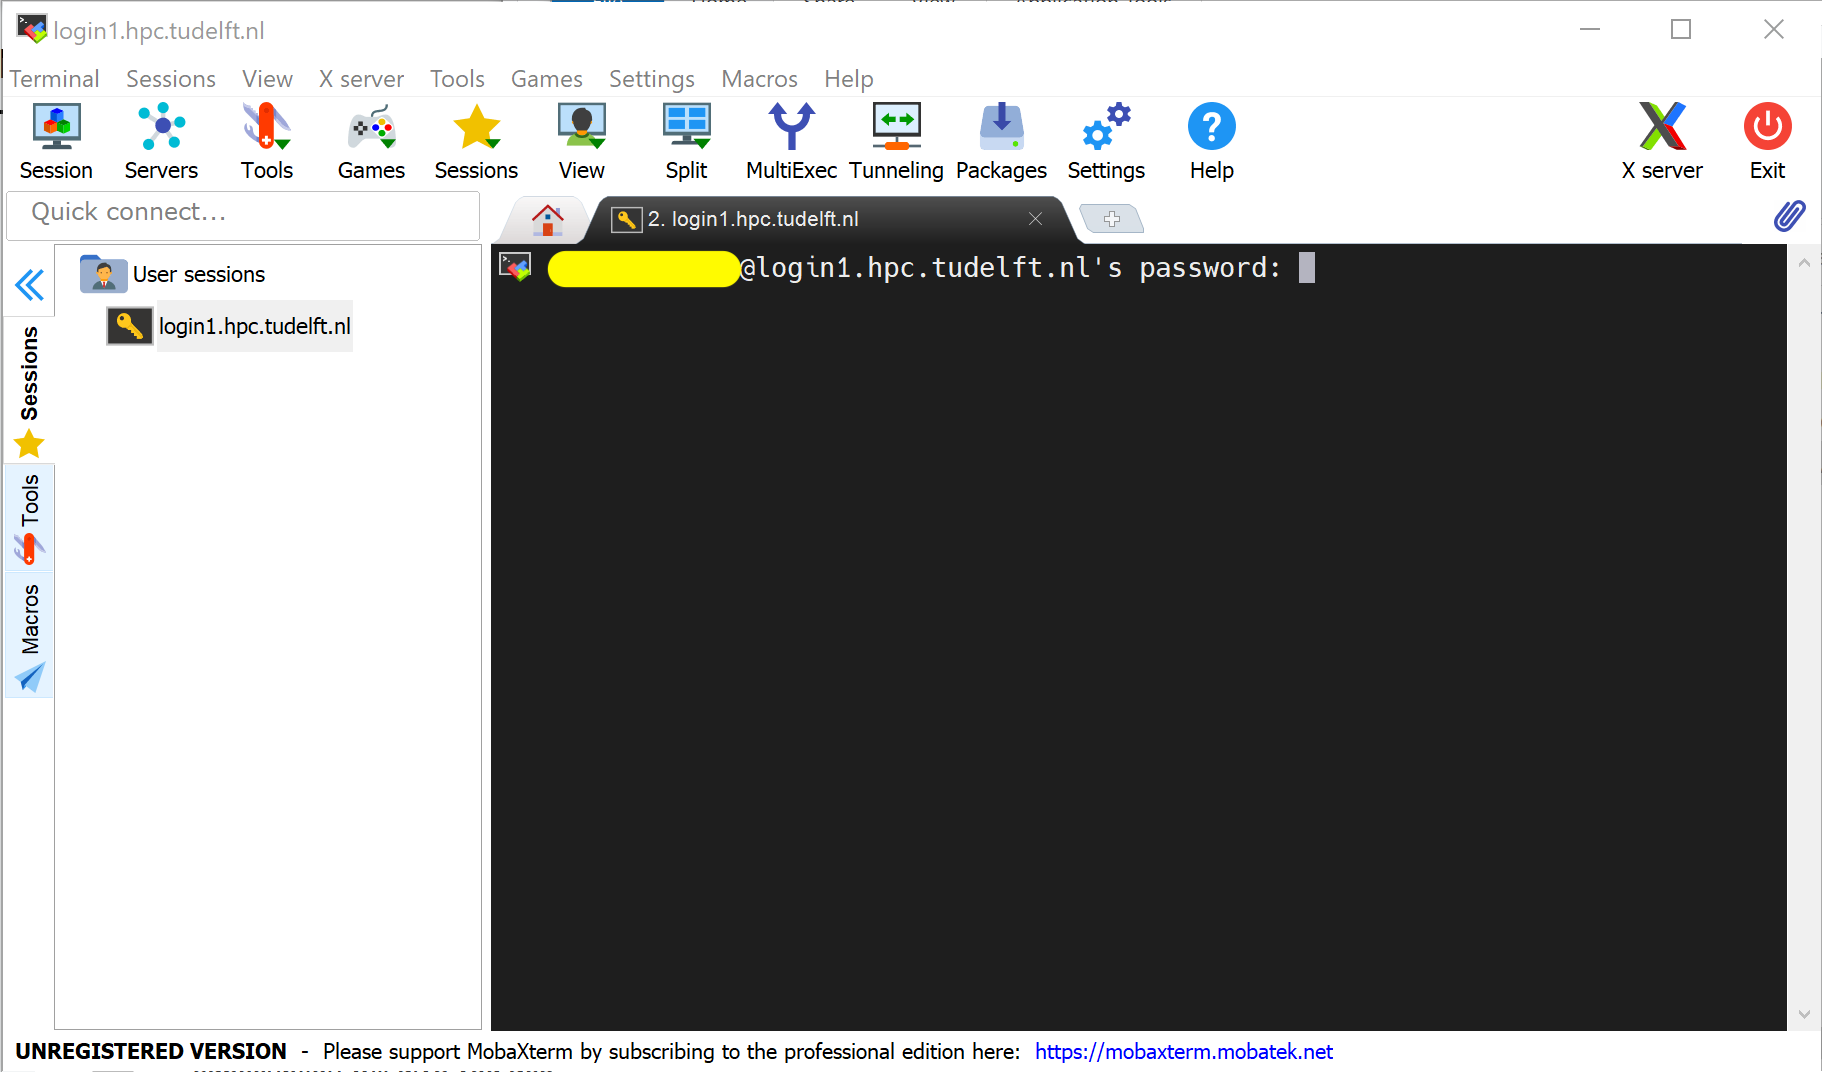
now the connection to the head node is started and the first time you are required to fill in your NetID password in the black screen after the prompt. NOTE: you will not see the cursor moving while typing; this is intentionally!
-
again you are requested to save your password. This time this is the password for
login1.hpc.tudelft.nl. - the SSH connection to the head node is now up and you can start working on the cluster
After this initial configuration you can reconnect to the head node by clicking on the session (on the left hand side) and you will not have to enter your password again (not for the bastion and not for the head node).
PuTTY
You can download PuTTY here: https://www.putty.org/. After installation you can connect to the server as follows:
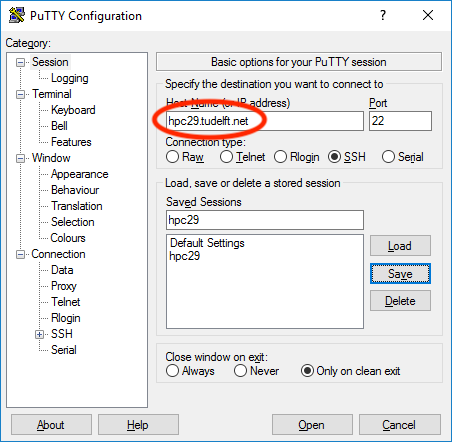
- Start the PuTTY program
- Fill in the name of the HPC server you would like to connect to:
- Disable GSSAPI under
Connection→SSH→Auth→GSSAPI:
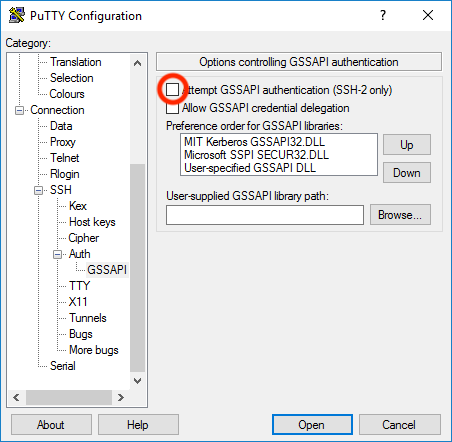
GSSAPI allows you to login via SSH using your Windows credentials. Although this is convenient, some functionality in Linux fails with this service. - Click
Opento start the connection - If this is the first time you connect to this server, you will see the following window:
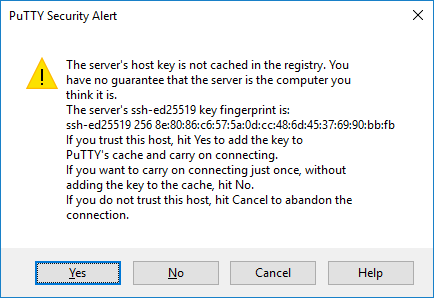
- Click
Yesto accept this key. Actually it’s a good idea to first read the message in this window! - A terminal window will open asking for your netid (grayed-out blocks) and password. Note: during the typing of your password you will not see any output on the screen:
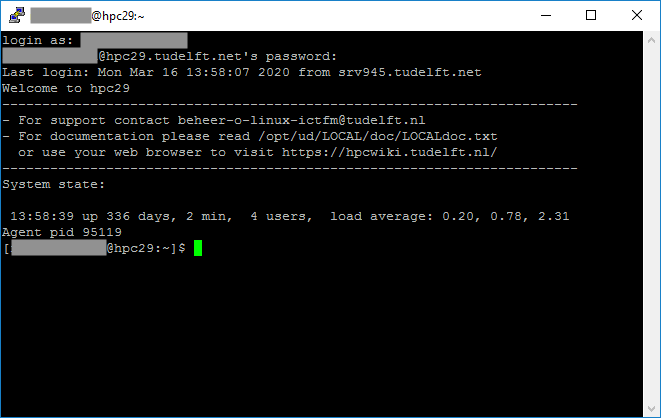
- You now have an SSH-connection to the HPC-server and you will get a green cursor after the prompt
$where you can start typing
WSL with Ubuntu
The WSL in Windows 10 allow you to install Ubuntu (a Linux OS). After installation a terminal with a shell can be started and most of the Linux programs are available. As such also ssh can be started. If needed the graphic output of the SSH-server can also be shown when in Windows an X-client is installed and activated (e.g. Xming).
Usage
Over the years the SSH protocol has evolved and now enables a multitude of ways to connect from one computer to the next. In this chapter several of these techniques are described each with their own merit and usefulness. An overview of these techniques which will be discussed later:
Plain SSH
Tunnel
Multiplex
Proxyjump
SSH requires authentication to ensure the integrity of user trying to access the server and to setup a encrypted connection. In this document we will discuss three different authentication mechanisms:
| Password authentication | Key-pair authentication | Kerberos authentication |
|---|---|---|
Which combination of technique and authentication is used depends on the configuration of the client and the server. In the table below you will find some combinations found at the TU Delft:
| client→ server↓ | Windows TU installed | Windows | macOS/Linux |
|---|---|---|---|
| linux-bastion | multiplex, password | multiplex, password | multiplex, password |
| HPC head nodes | proxyjump & multiplex, password | proxyjump & multiplex, password | proxyjump & multiplex, password |
| awi servers | proxyjump & multiplex, key | proxyjump & multiplex, key | proxyjump & multiplex, key |
under construction
Good luck!