GIT
Introduction
For more information on the origin of Git see fourth panel:
Tracking changes
Version control
Collaboration
Typical workflow
Below is a very short and totally incomplete example on how to use git. We’re using desktop for your computer were you are viewing or modifying the repository and server where the repository is centrally stored.
existing repository from server
- get repository from server to desktop
- if this is the first time, use clone:
git clone - if it is already cloned, use pull:
git pull
- if this is the first time, use clone:
- modify content on desktop
- add modified and new files to the desktop repository:
git add - commit all changes to desktop repository with an annotation:
git commit -m "<annotation>" - push desktop repository to server:
git push
Typically you pull the repository from the server in the morning to get the latest modifications. During the day you will make changes, add and commit them regularly, i.e. after each important change. Before closing the day you push the local repository back to the server.
GitLab
Windows setup
To integrate the use of git with the gitlab server on Windows you can either use the graphic setup or the command-line setup. For both methods you need to install Git. For the graphic method you will also need to install PuTTY and TortoiseGit.
Retrieving the repository from and storing it to the server can be done with the git-commands. Because we communicate with an open server some sort of authentication is needed to restrict access and provide encryption during transport. This can be done with an SSH connection or HTTPS connection. For several reasons which we will not discuss here the SSH method is preferred. In the steps below your system is setup to authenticate your connection to the server via SSH. This means we need to create a SSH key-pair consisting of a private and public key. The private key is stored on your computer and the public key on the server. During the connection both keys are used to authenticate and to encrypt transport.
Note
You can create the private key used for authentication with the gitlab server without password. This is not very safe but makes life a lot more fun!
Graphic setup
-
install Git
- download from here https://git-scm.com/download/win
- accept the default settings during installation
-
install PuTTY
This package allow you to connect via SSH to remote computers; for more information check: SSH. In this case we will use the
PuTTYgenapplication in this package to create an SSH-key. This key will be used to authenticate your access to the GitLab server.- download from here https://www.chiark.greenend.org.uk/~sgtatham/putty/latest.html
- accept the default settings during installation
-
install TortoiseGit
This package integrates git with the Windows explorer for easy graphic handling of all your git actions.
- download from here https://tortoisegit.org/download/
- accept the default settings during installation and make sure you select the
Run first start wizardbefore clickingFinish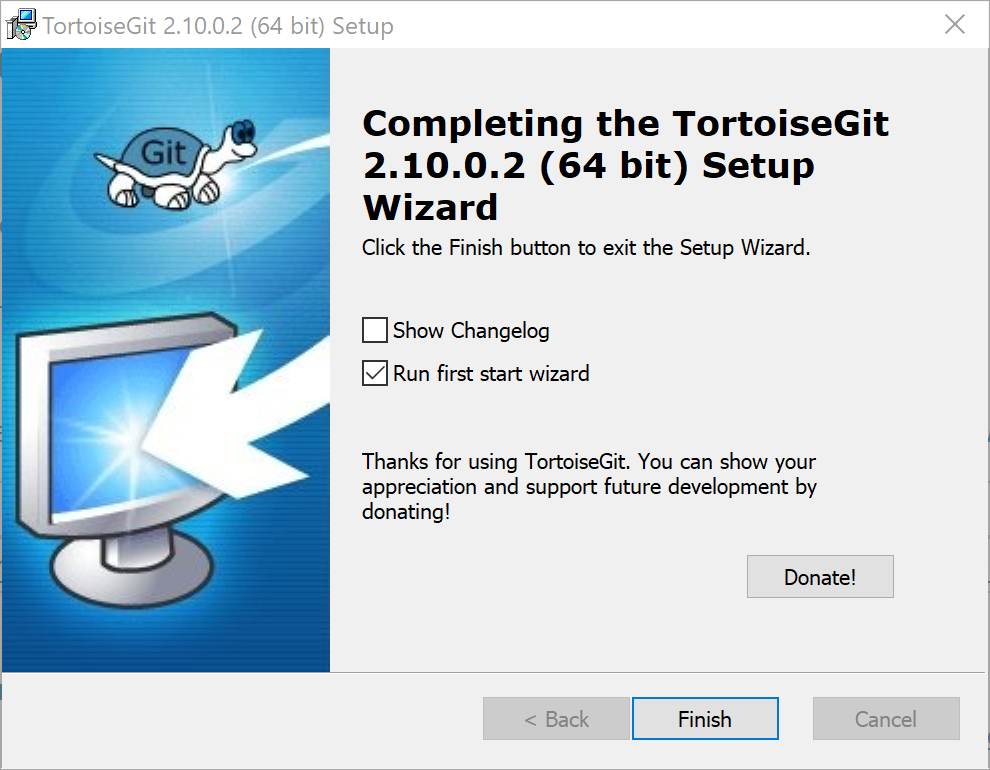
- accept the default settings in the wizard and enter your name and e-mail address which will be used to annotate changes in the repository with your id and click
Next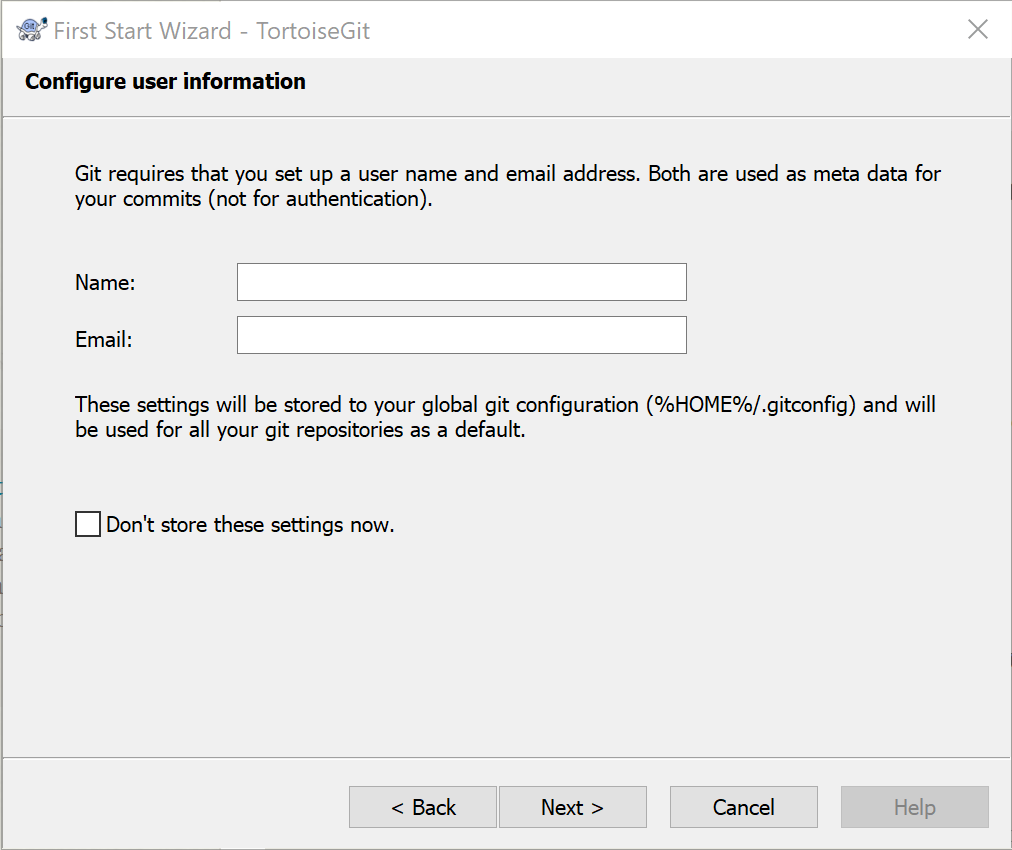
- you could create a SSH key-pair in the wizard but below we will also explain how to create this key-pair with
PuTTYgen. Accept the default settings and close the wizard with clickingFinish.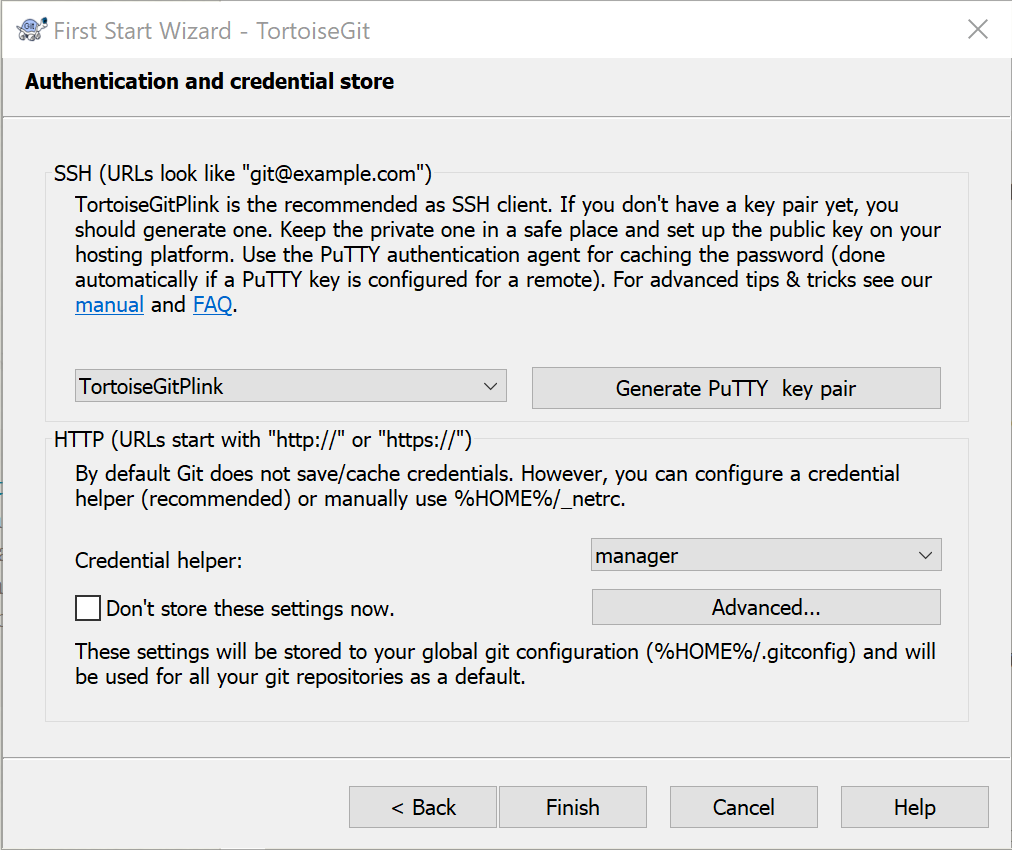
-
create SSH key-pair with
PuTTYgen- start
PuTTYgen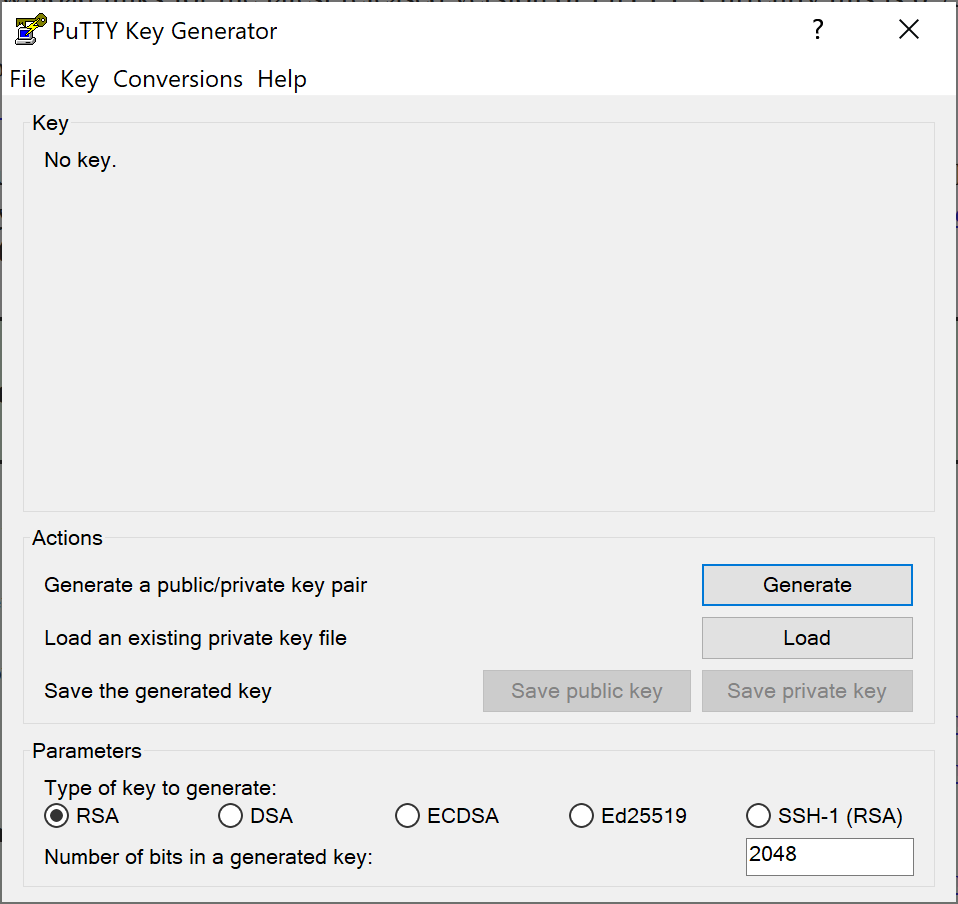
- click
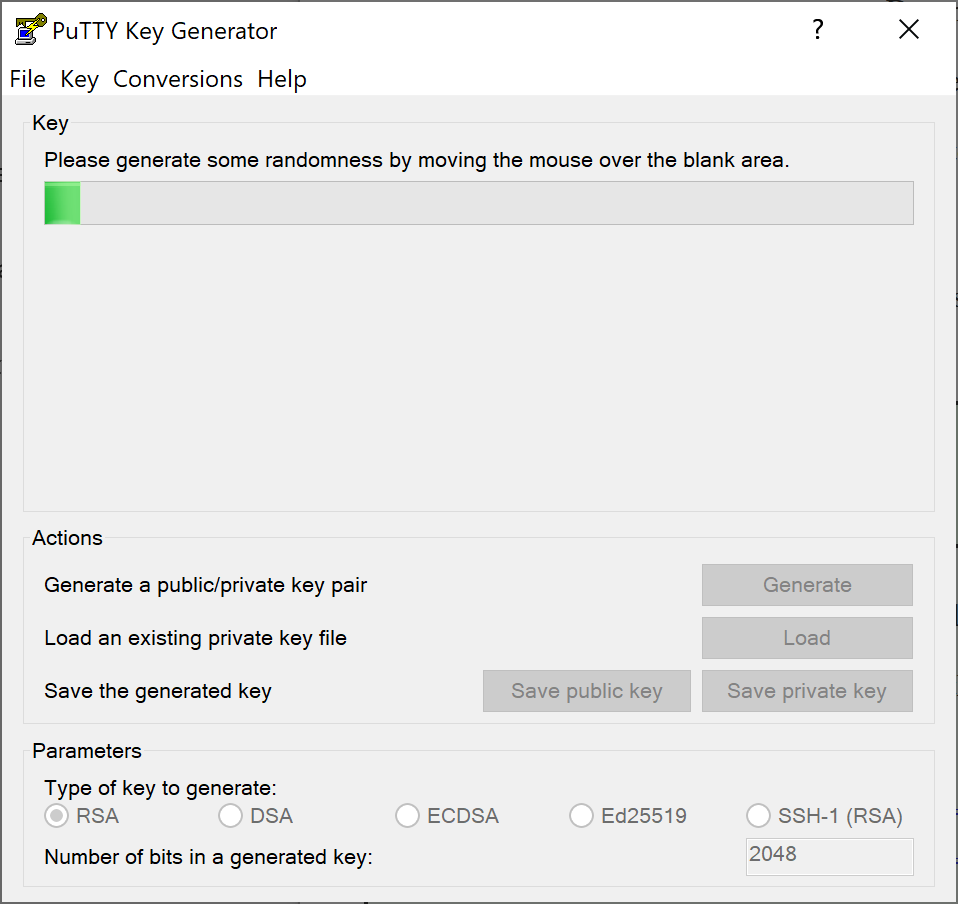
Generate - during key-generation you create randomness by moving your mouse inside the gray area (blank area). You will see the green progress-bar moving
- store the private key as a
.ppkfile and remember this location for later use. Choose whether you would like to use a password or not (see Note above) - copy the complete public key as shown in the upper window under
Public key for pasting into OpenSSH authorized_keys file: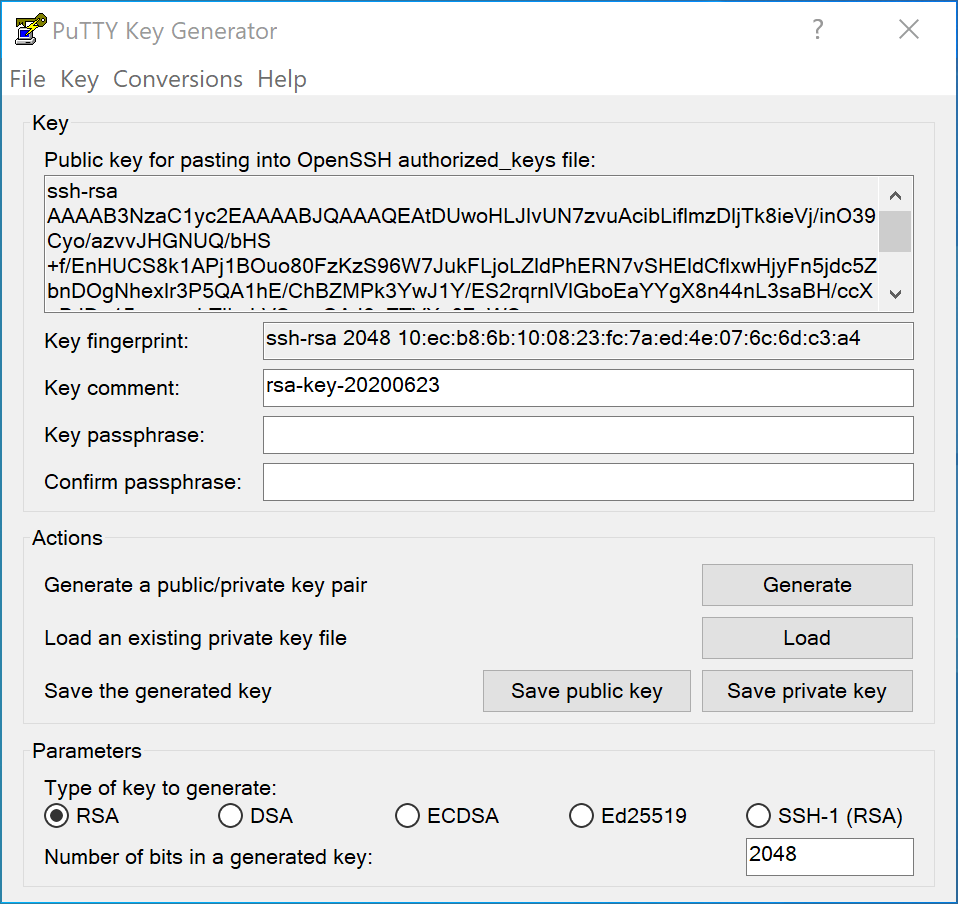
- start
-
install public key in GitLab
- open the gitlab webserver: https://gitlab.tudelft.nl
- login with your netid and password
- select your account in the top right corner and from the drop-down menu select
Settings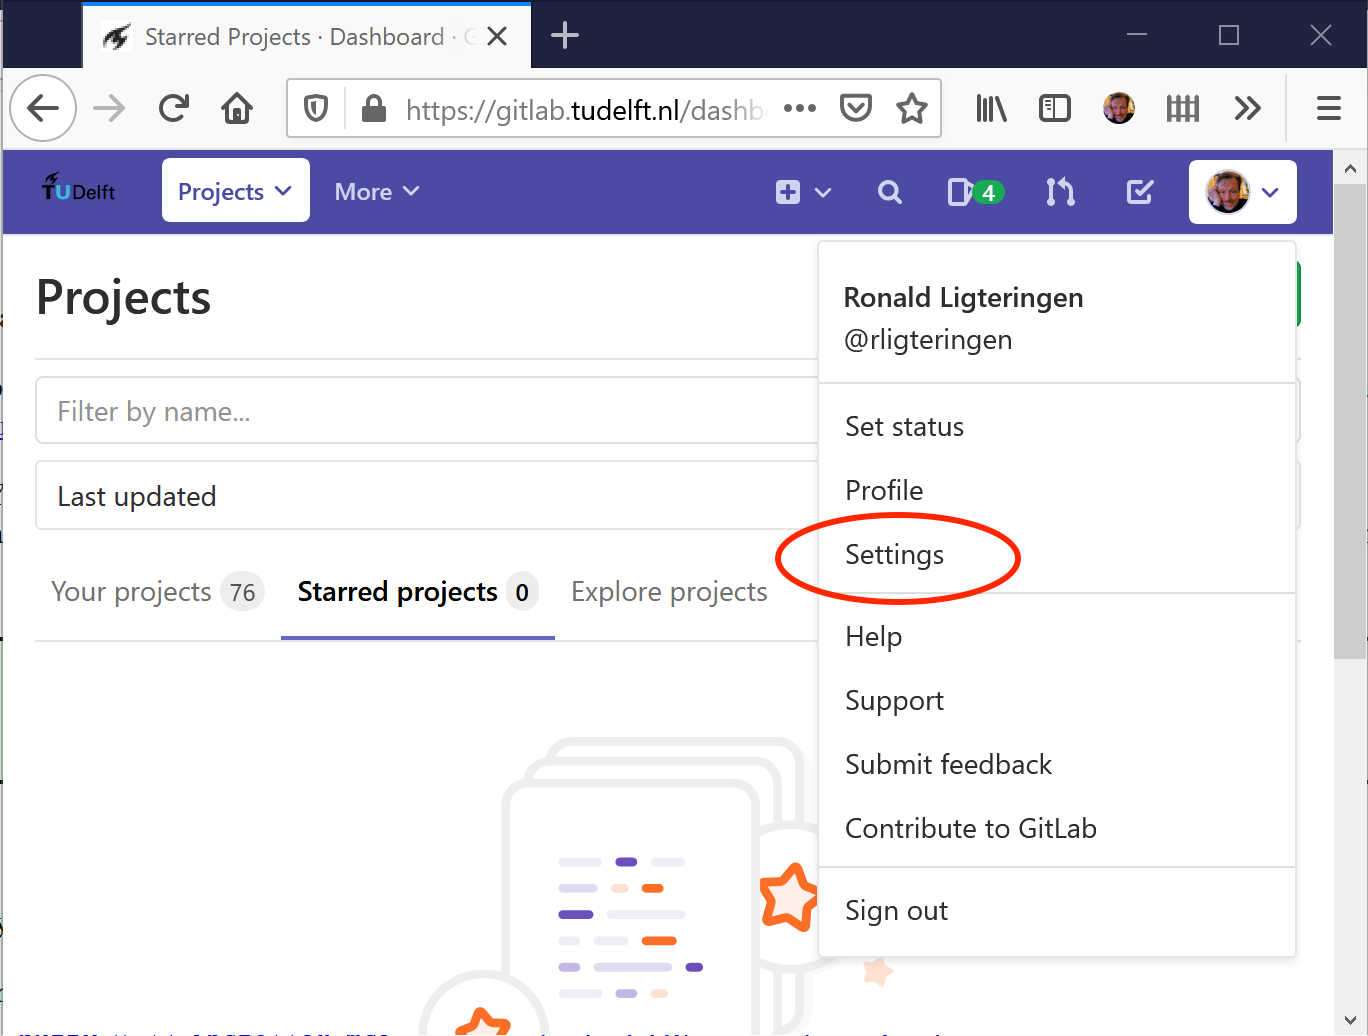
- on the left side select
SSH Keys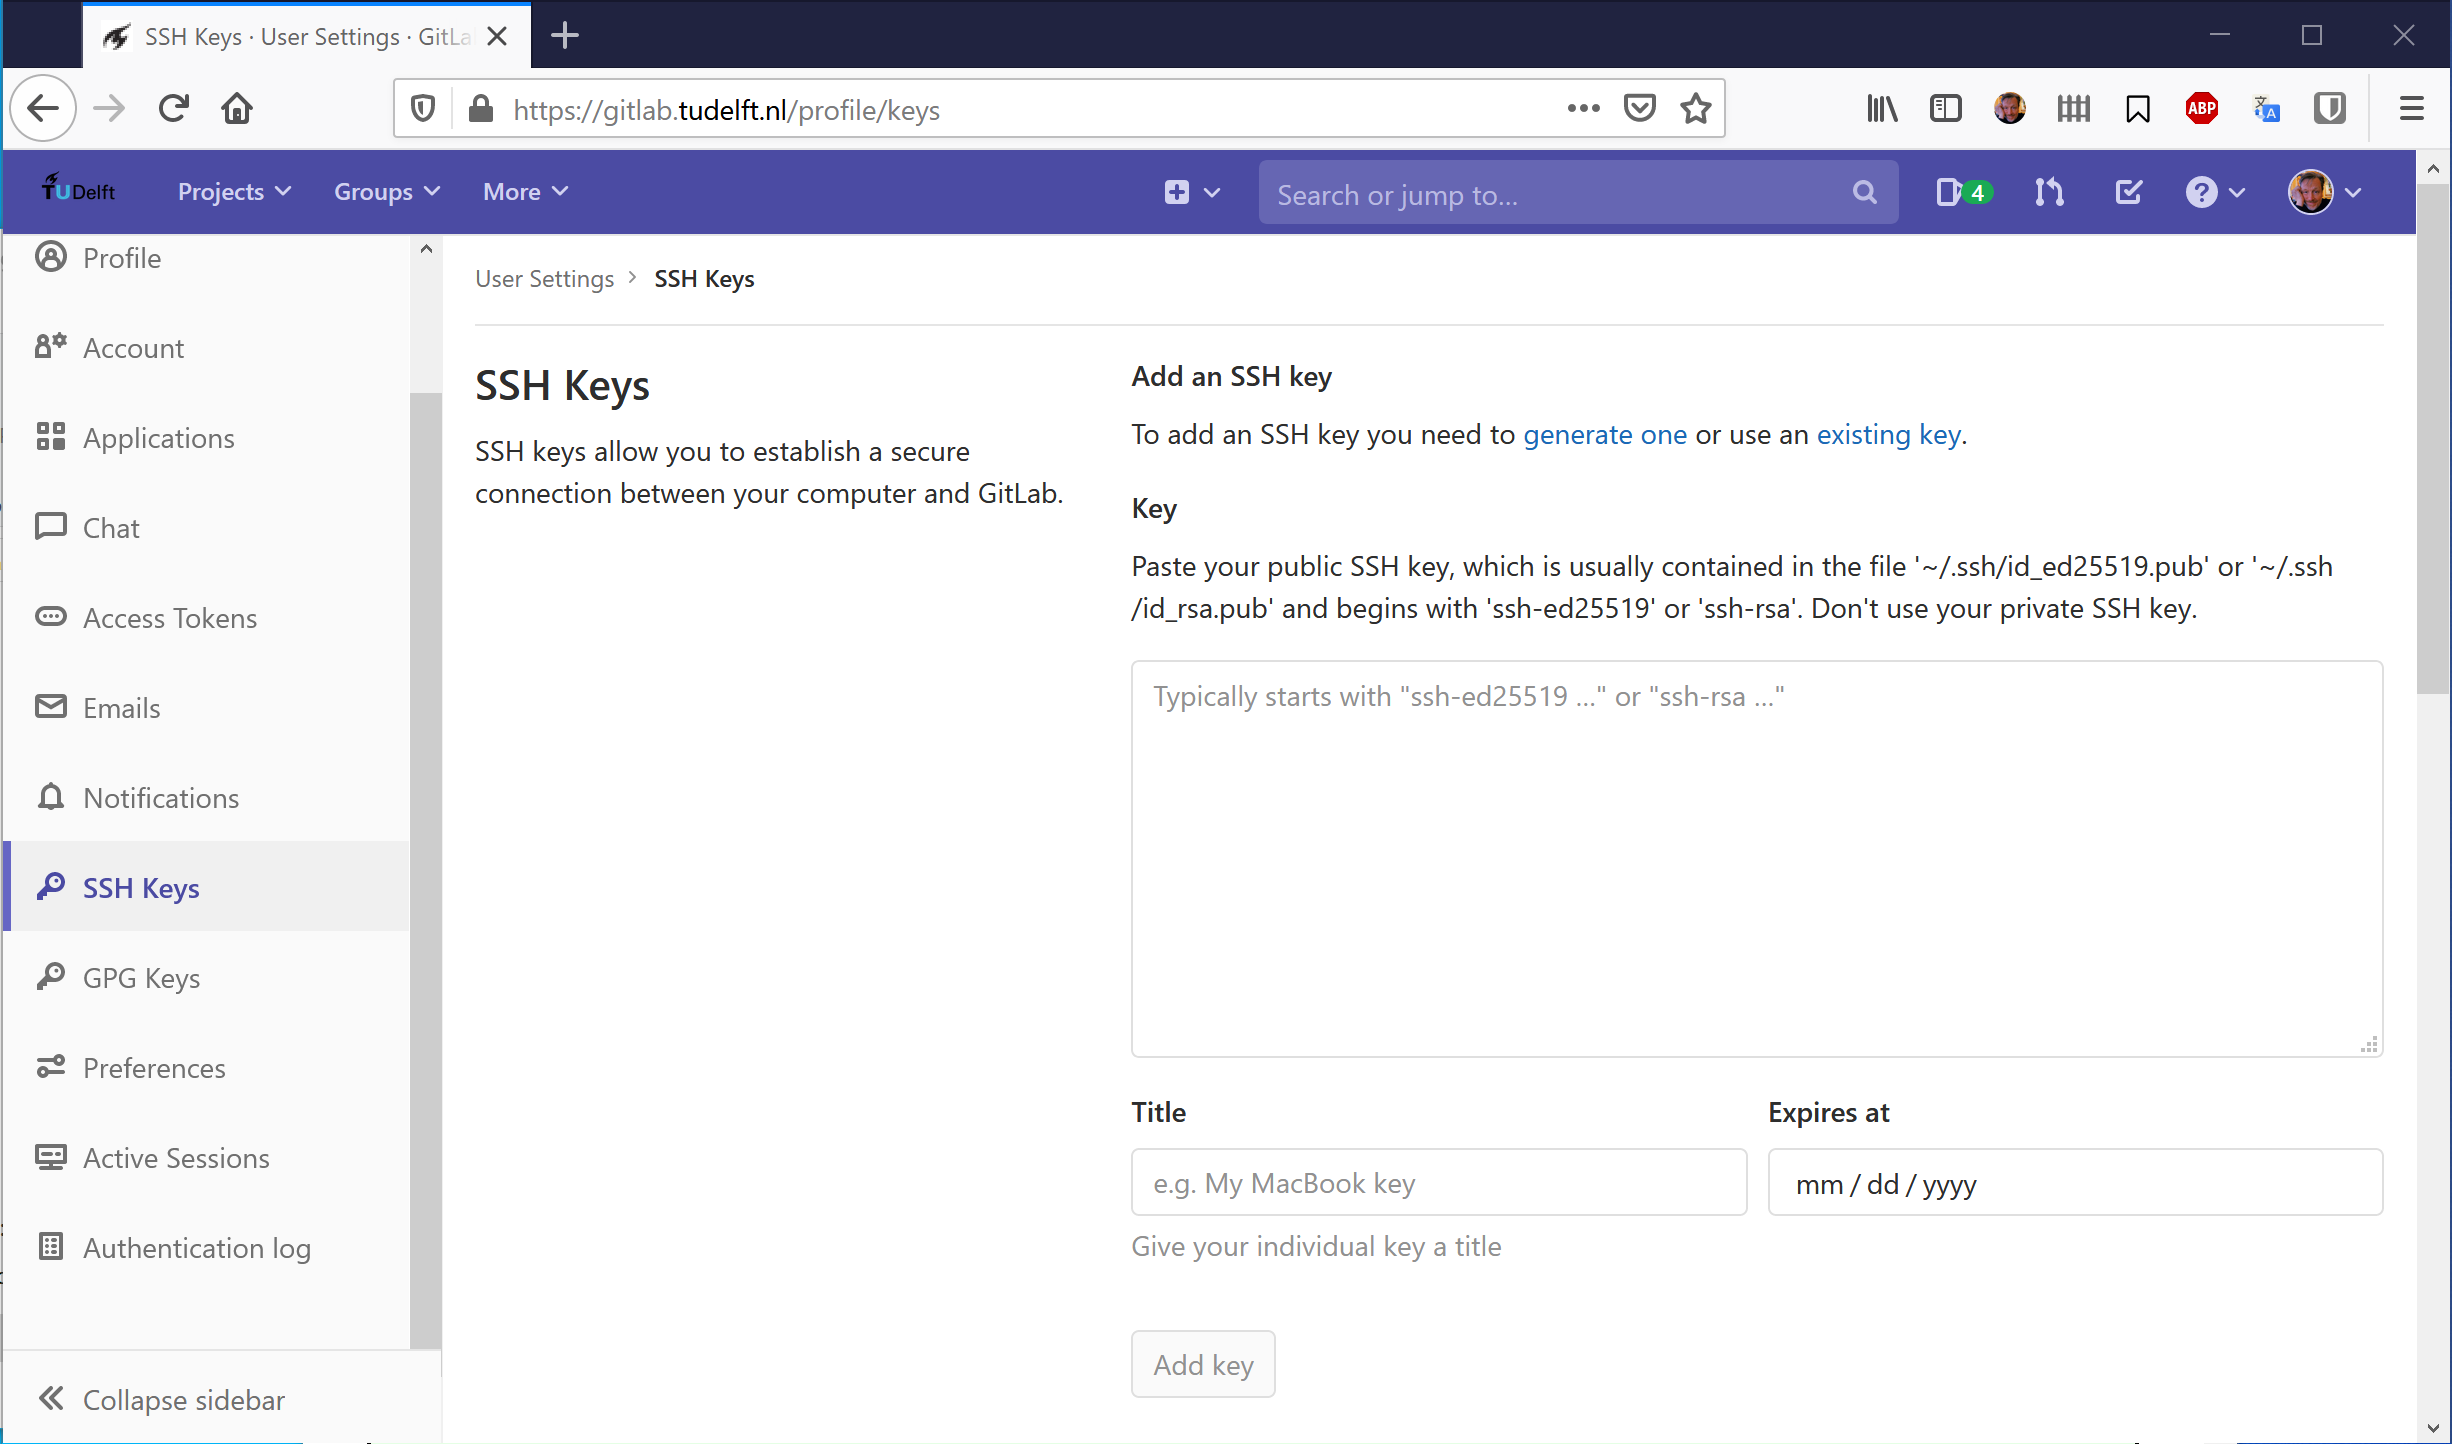
- paste the public key from
PuTTYgenin theKeywindow and pressAdd key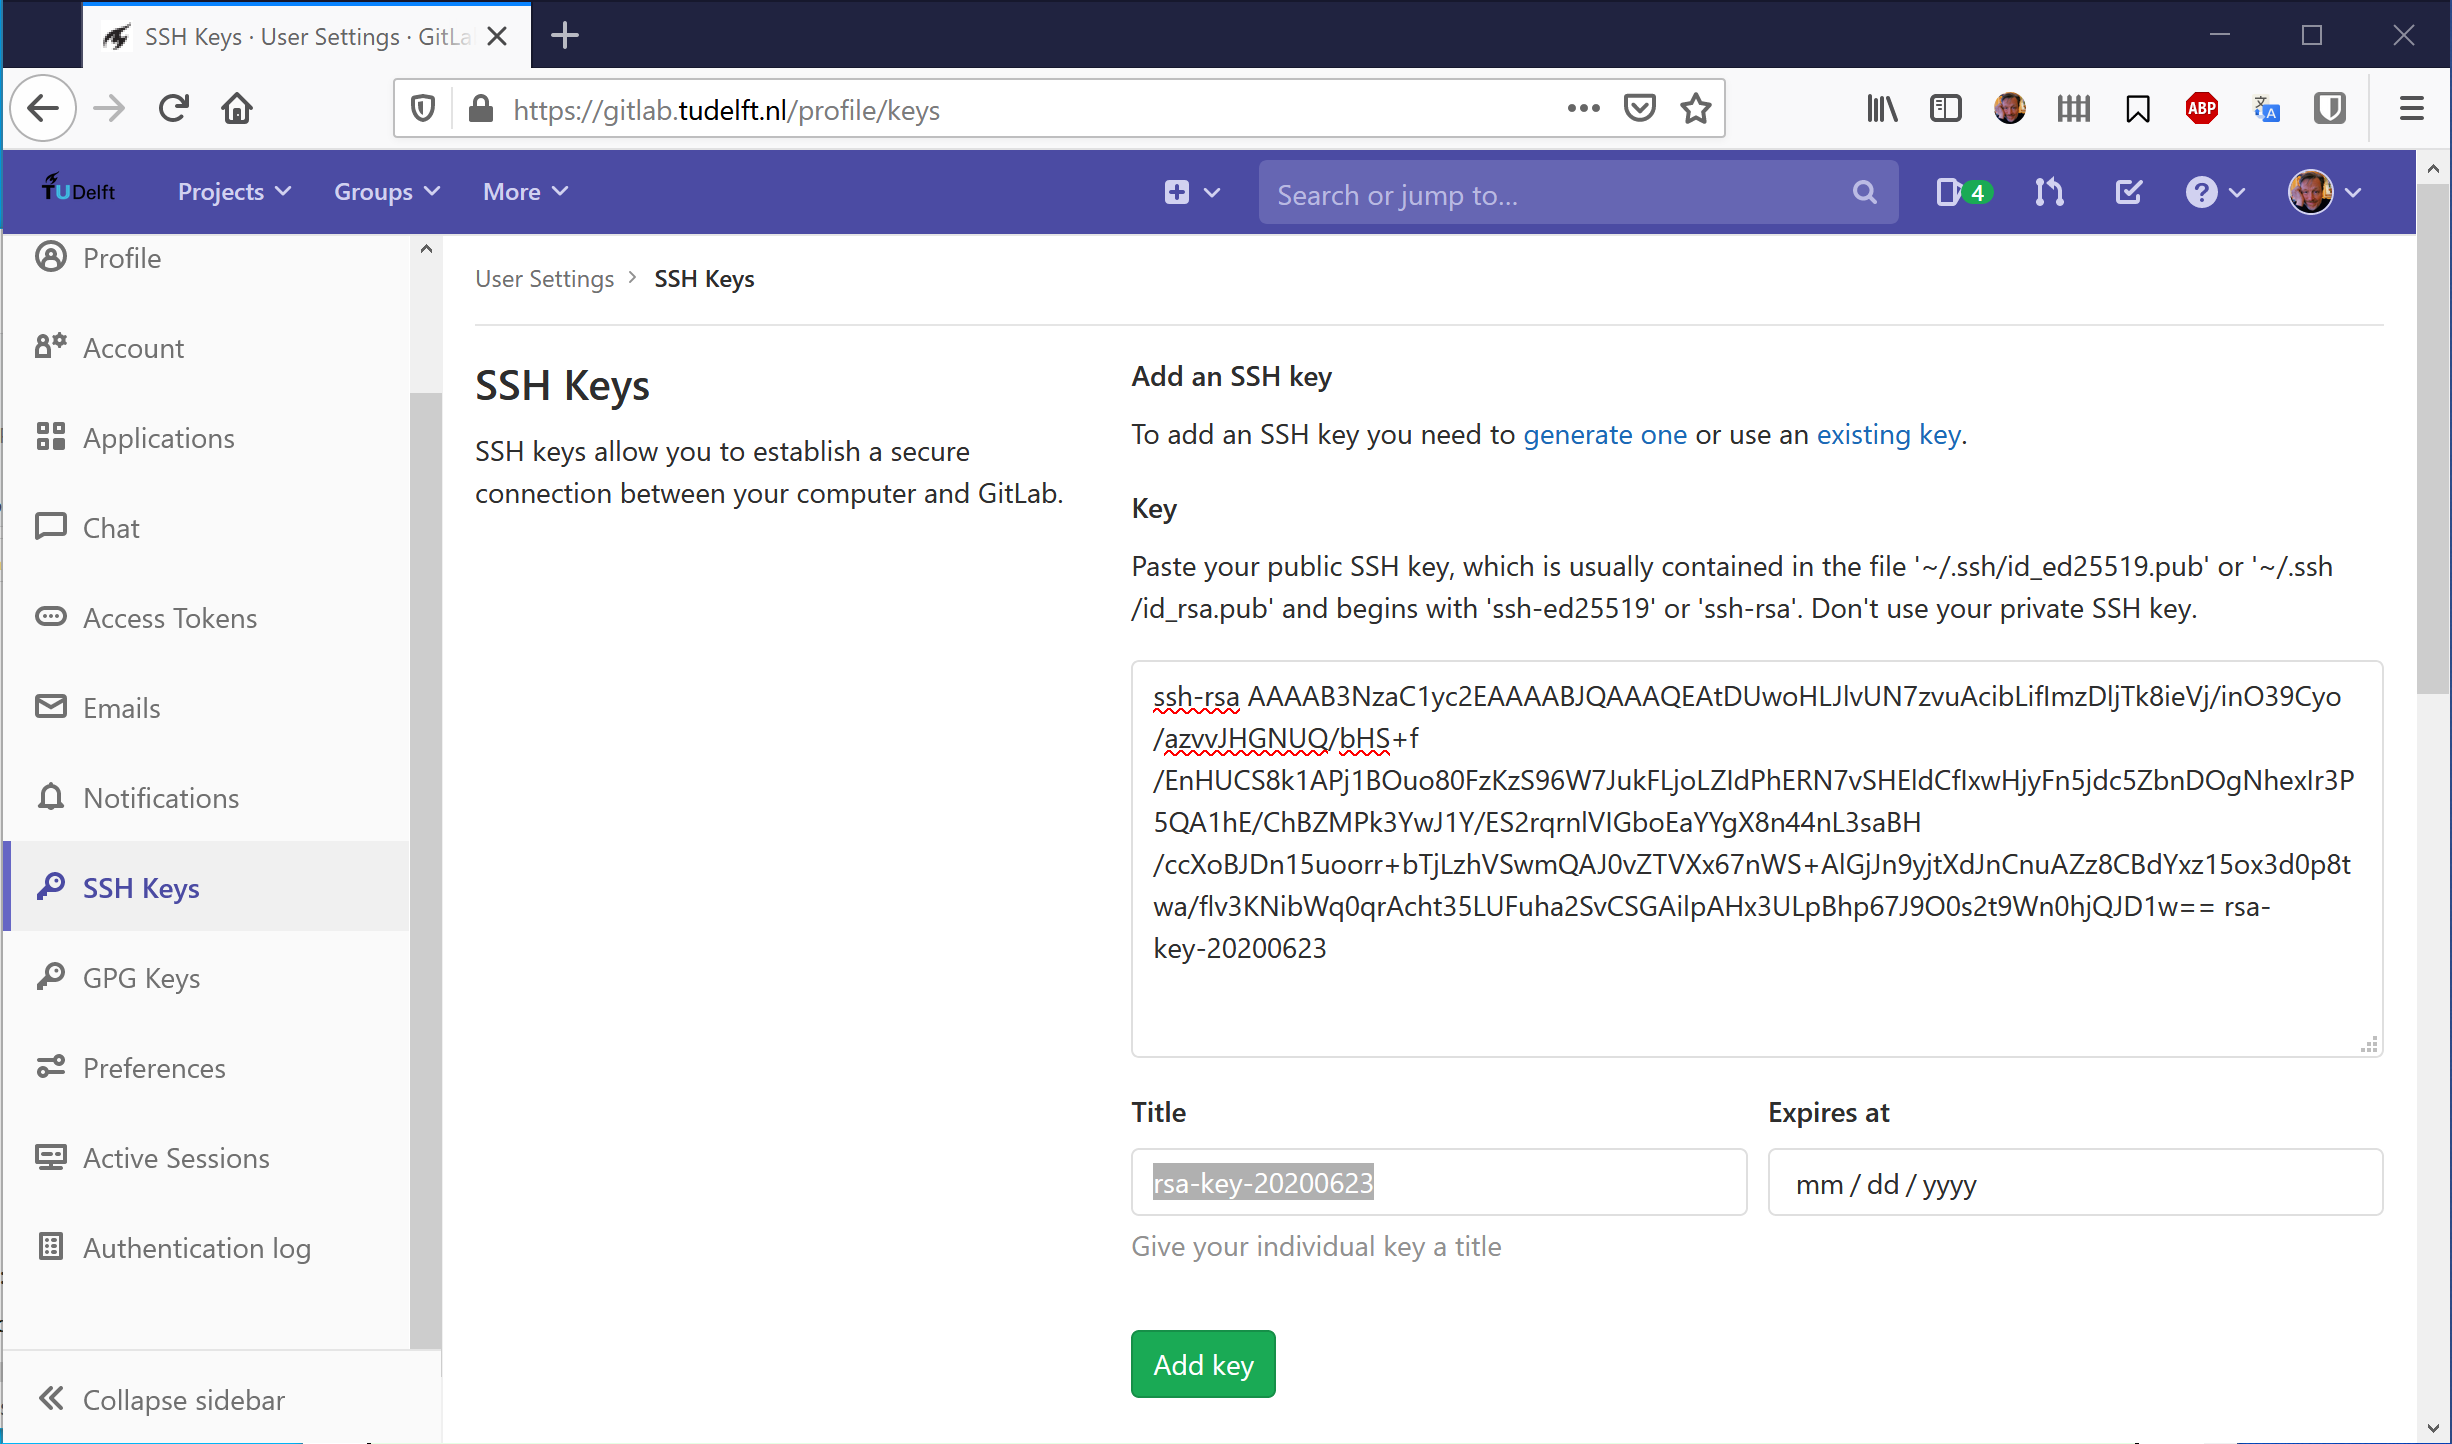
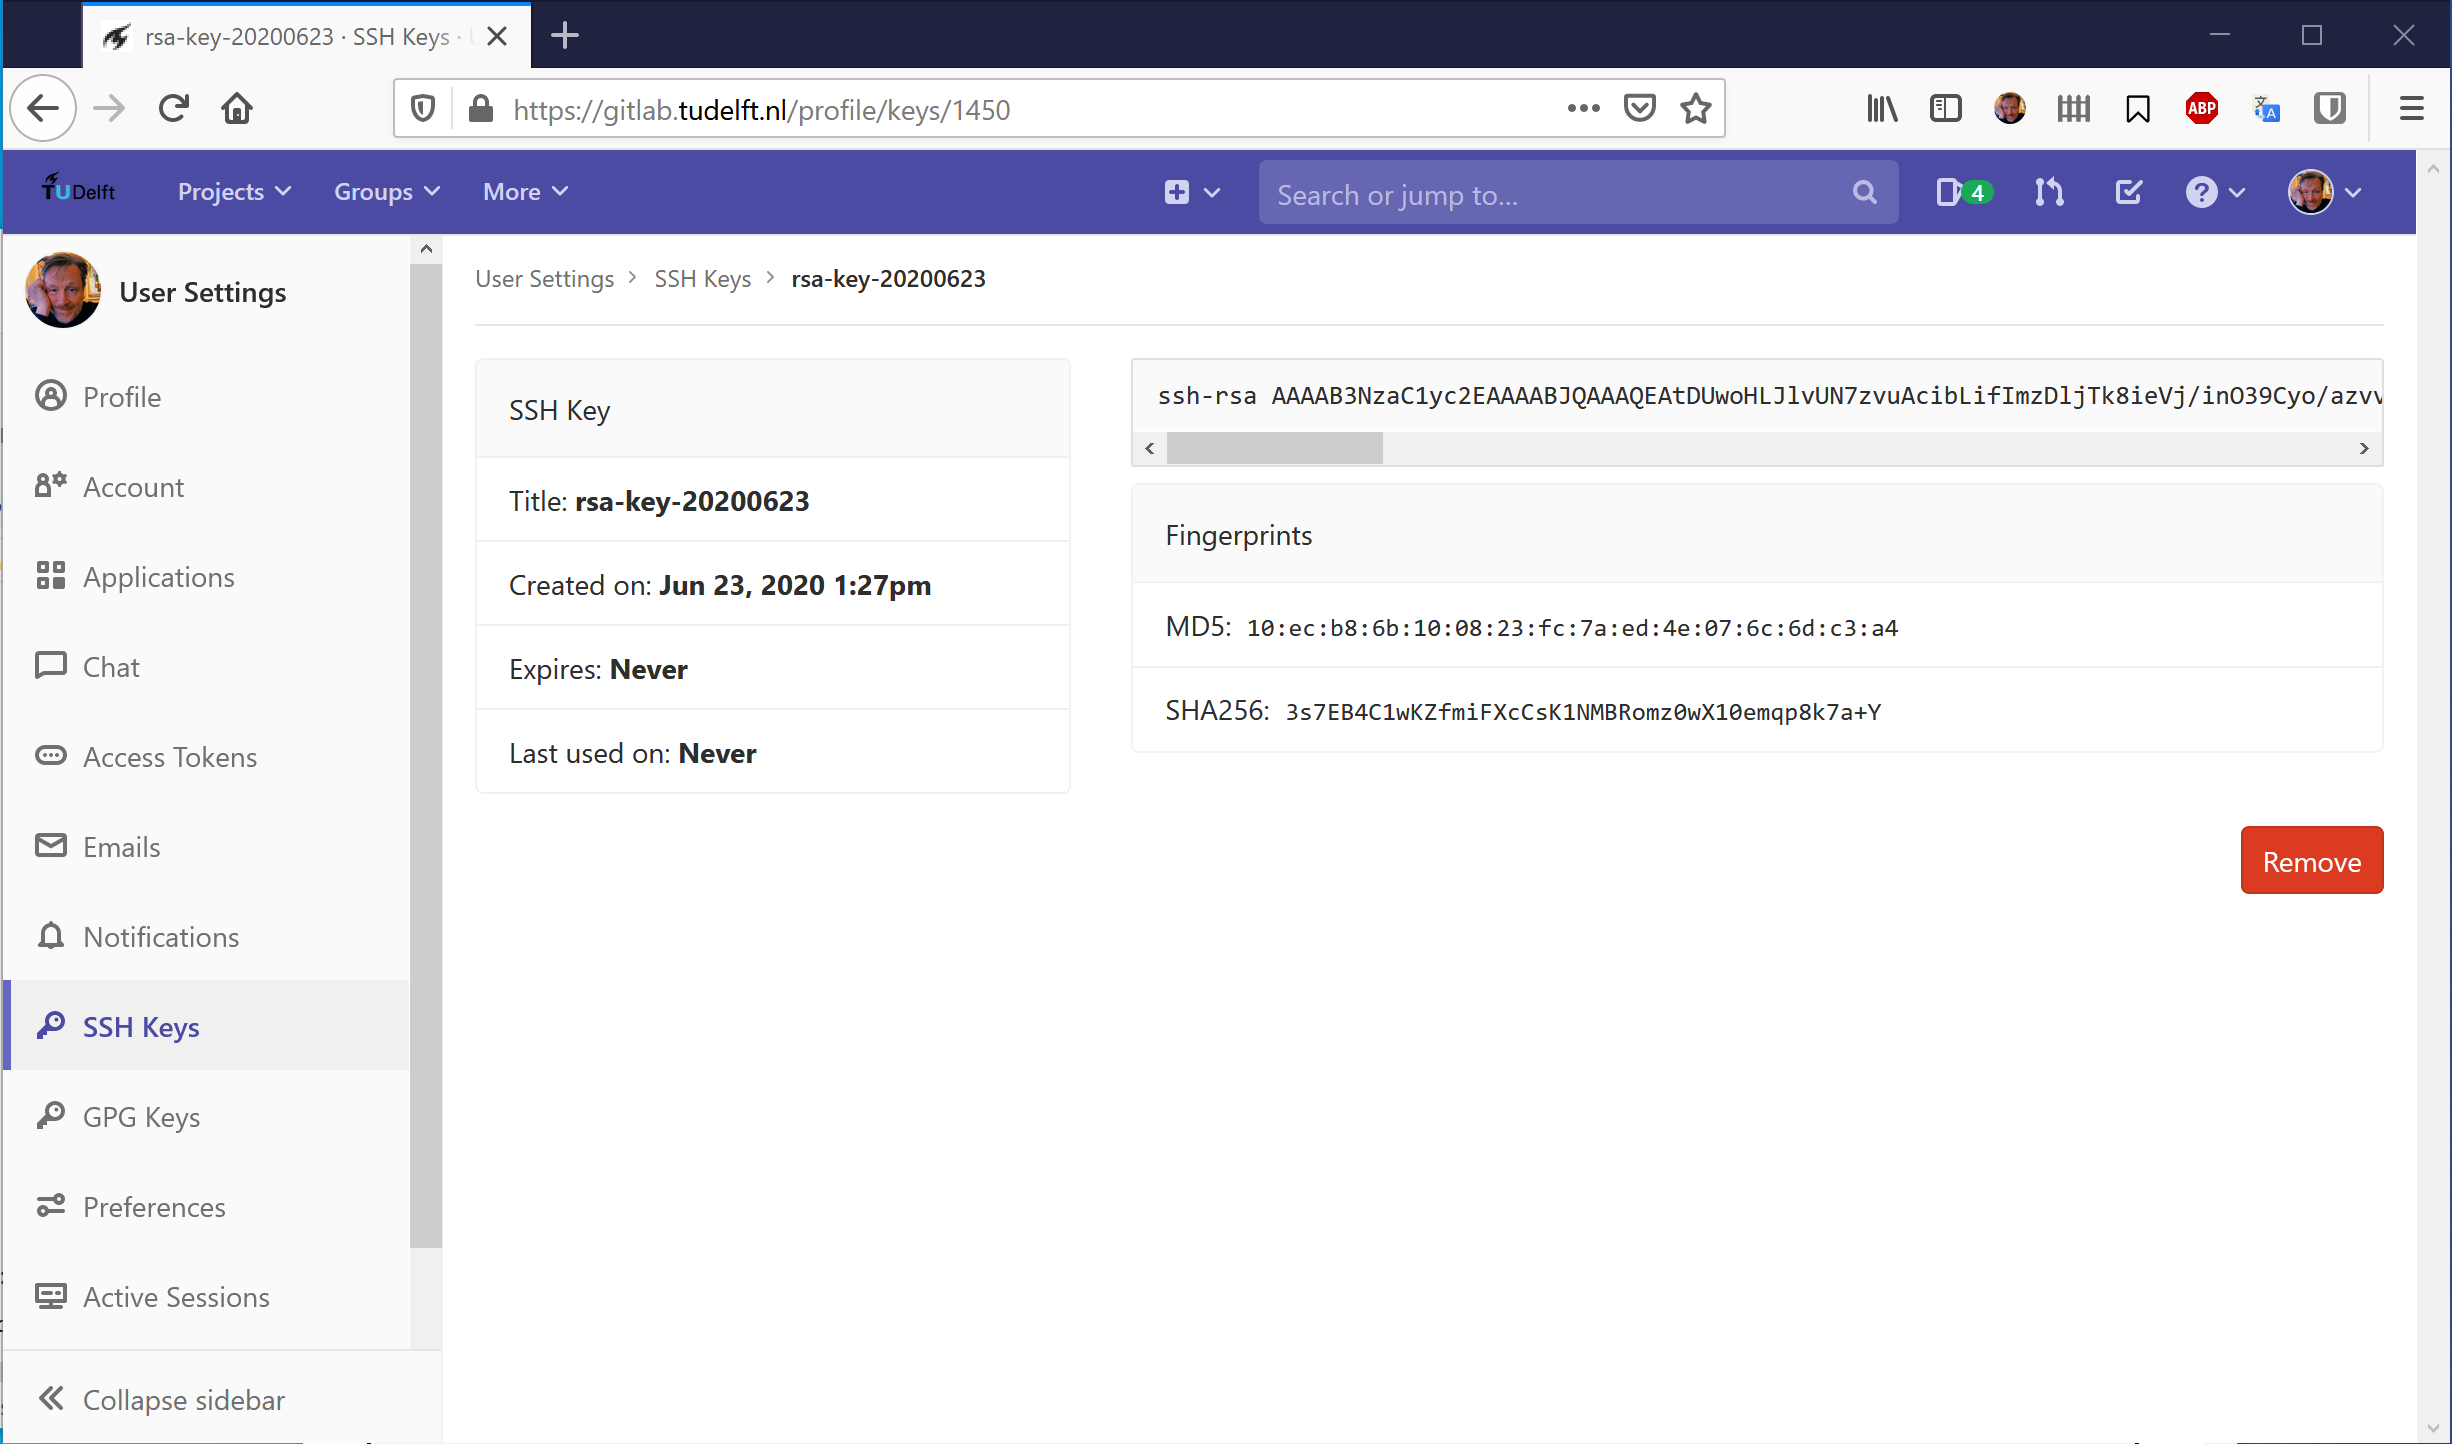
- your public key is now saved in GitLab for your account
-
configure TortoiseGit to use the private key for authentication
We are now ready to clone an existing repository from the gitlab server to our computer with the use of the Windows explorer integration of TortoiseGit and using our stored private key.
-
find the URL of the repository you would like to clone to your computer via the gitlab website. Select the blue
Clonebutton on the right side and click the clipboard icon next to theClone with SSH-URL. This will copy the URL to your clipboard.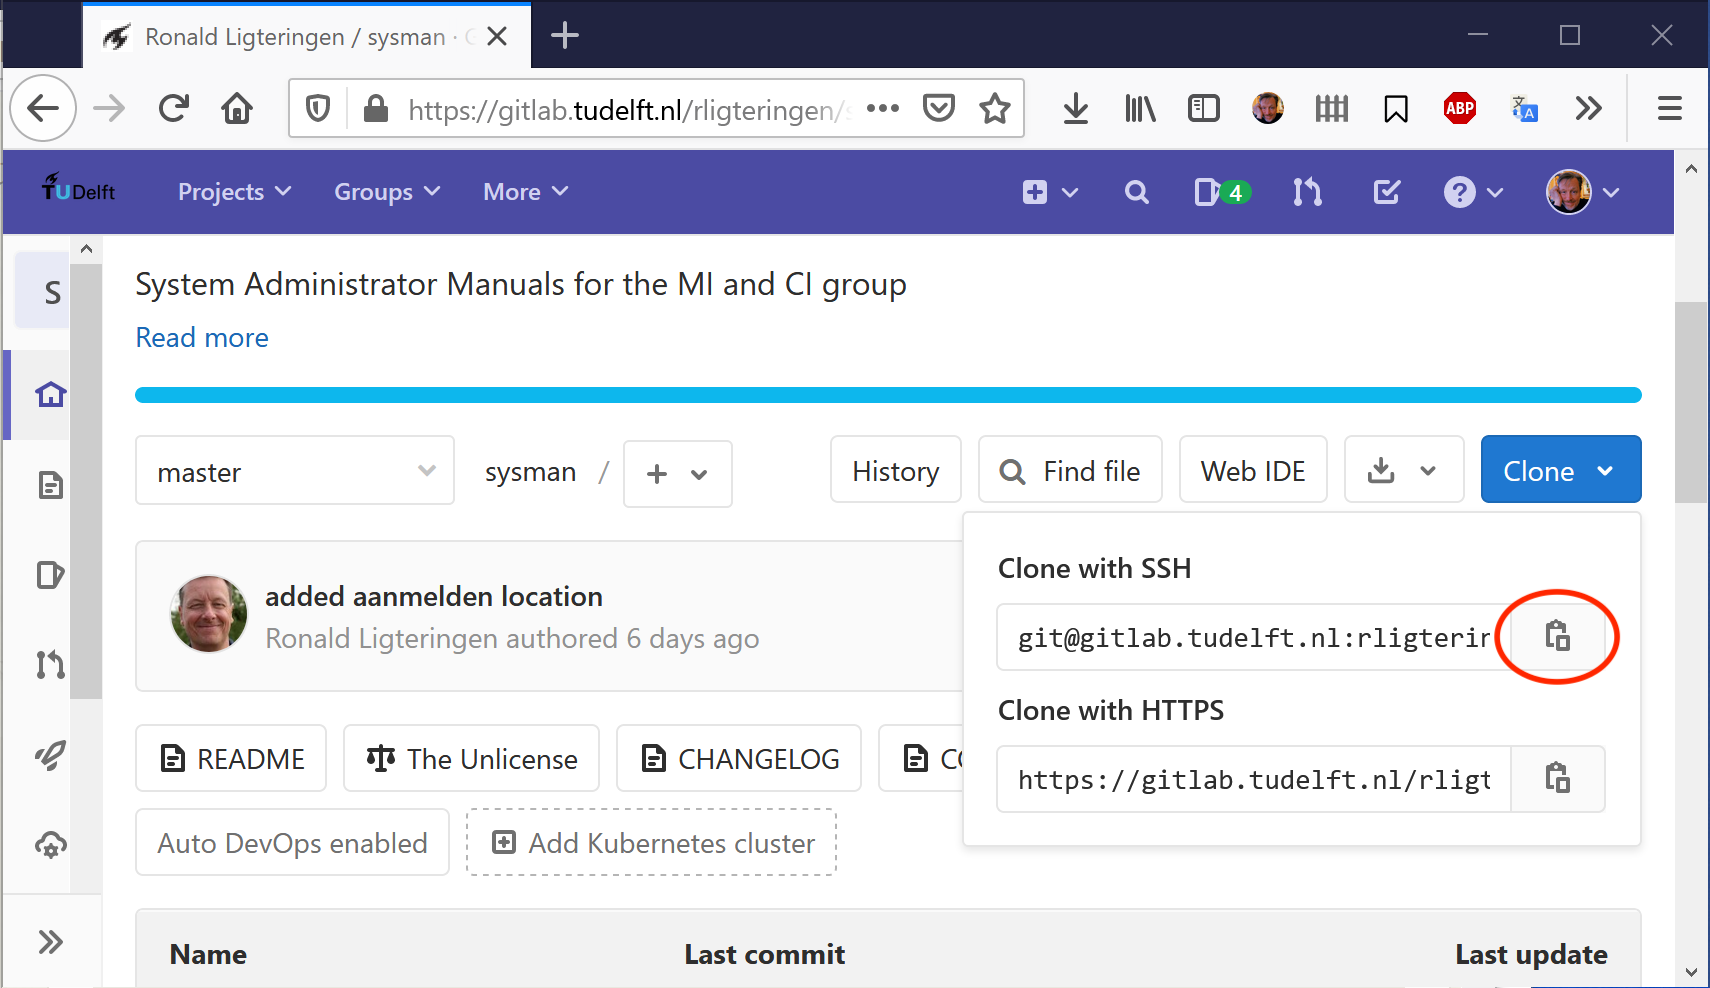
-
in the Windows explorer go to the location where you would like to clone the repository and right-click. Select the
Git Clone...menu-item.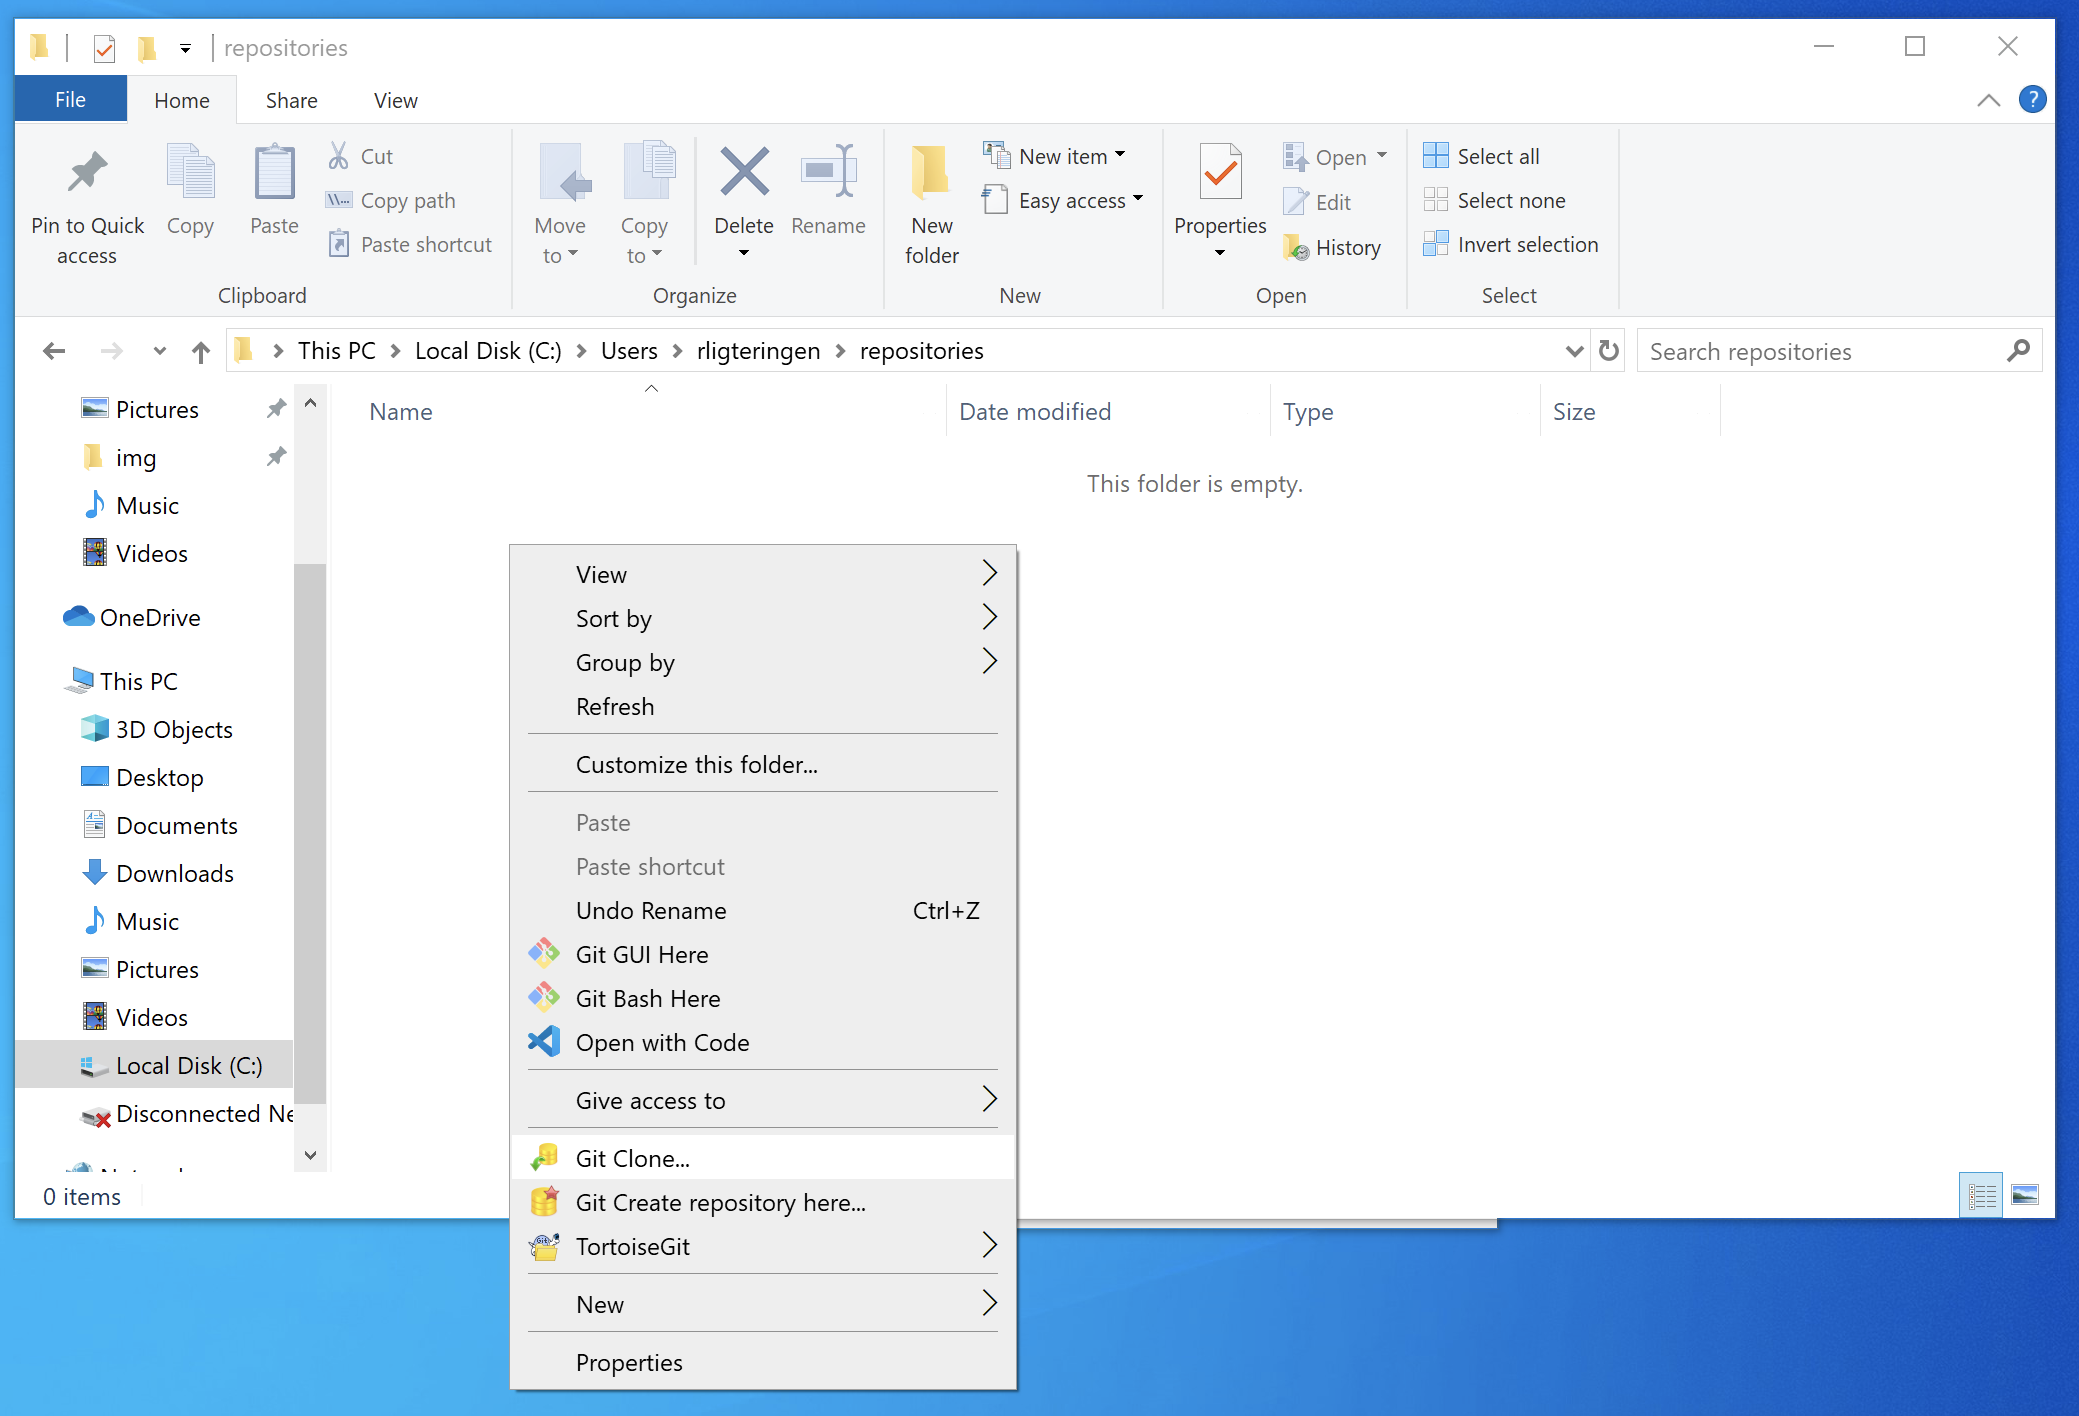
-
copy the URL and click the button with three dots
...to select the private key file with the extension.ppk. ClickOKto continue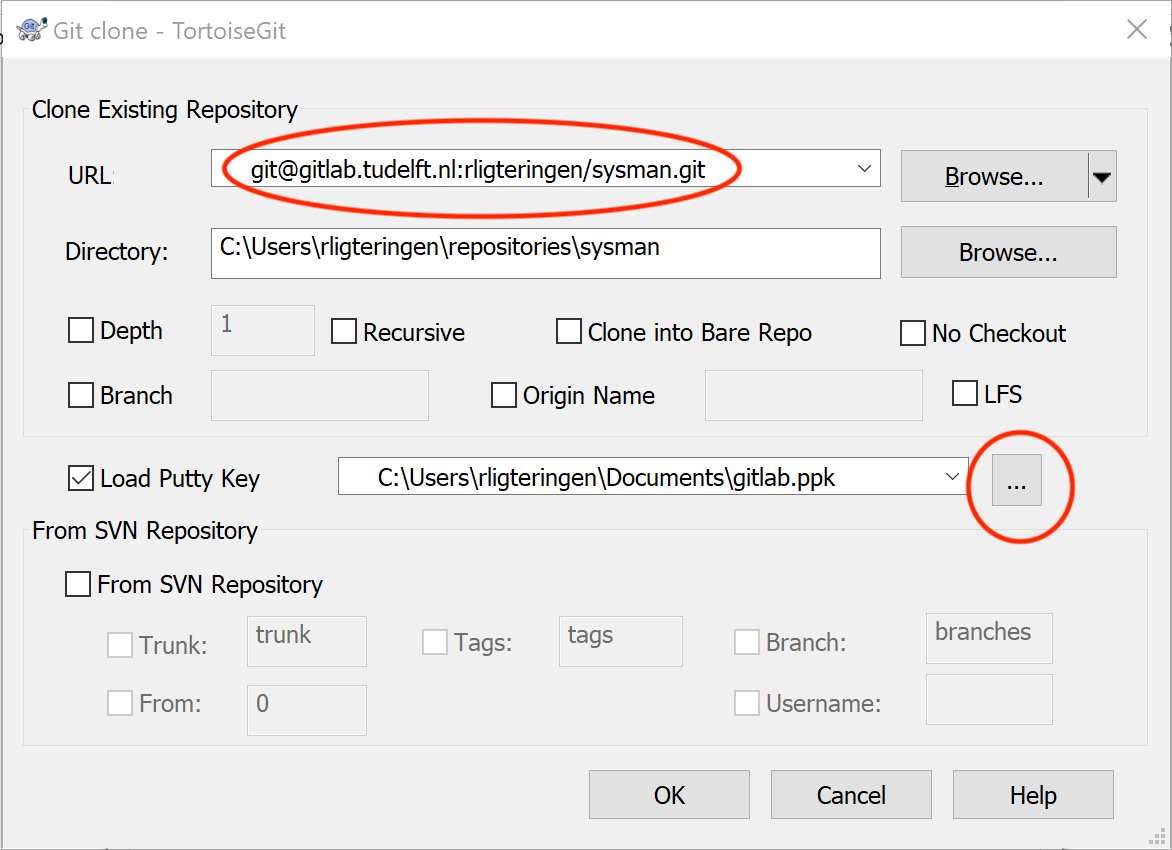
-
the first time you are using this SSH key-pair to connect to the gitlab server you will receive a warning asking you to confirm this is the valid server address. Please read this message and select
Yes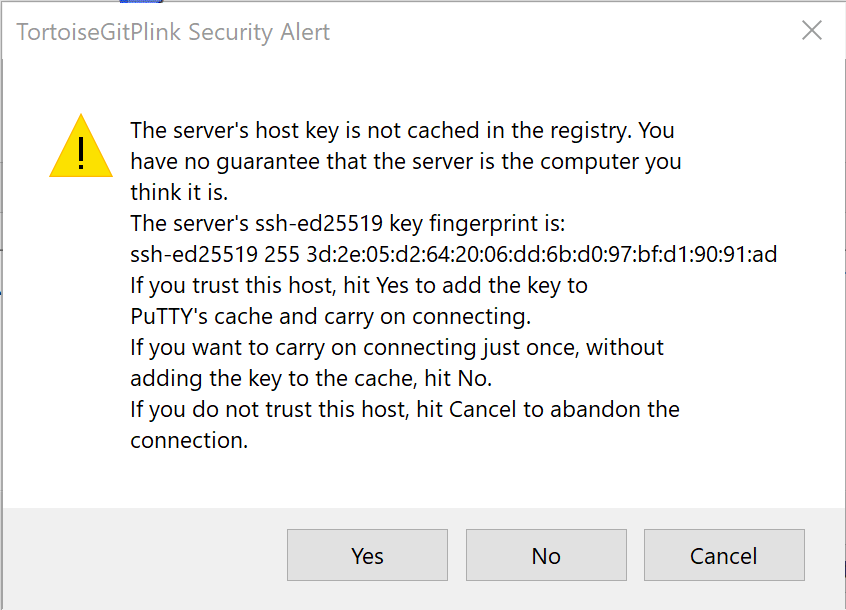
-
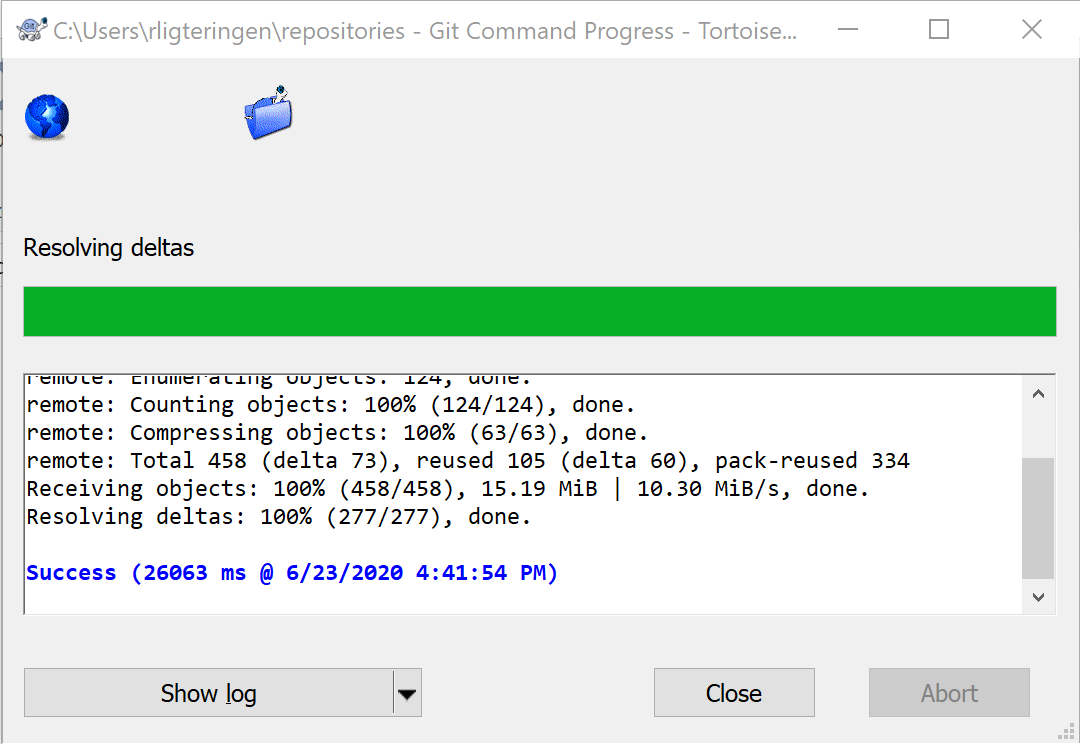
finally the repository will be cloned as shown in the logging
-
the git repository is now stored on your computer and can be managed with git via the right-click menu on the directory
-
As an alternative you can also install and use the SourceTree package which gives you a graphic browser to your repository and allows for easy maintenance of your code:
This program does not have an integration with the Windows Explorer.